A deep dive into the Tenda 4G185 v3 MiFi device with a load of reverse engineering, messing with scripts and finally getting access and running my own code and hosting this website!
Introduction
The Tenda 4G185 v3 is a ‘MiFi’ device - a mobile WiFi Router, it has a 4G/LTE modem and WiFi chip and in between is a small embedded linux system which manages the configuration and bridges the traffic. These MiFi devices seem best placed were you want a dedicated WiFi router rather than hotspotting off your phone or to be used as a backup if your home/business internet connection went down.
Following a post on Mastodon by @ge0rg@chaos.social about opening up and hacking a MSM8916 based LTE routers I was inspired to get my own MiFi device and see whether it was ‘hackable’ and whether I could make it do something more. The problem is that these MiFi devices are going to quickly become redundent as mobile/cell networks become more advanced particularly as 5G is compariable to fairly good WiFi and so we are at risk of ending up with a lot of e-waste. If we could learn more about the devices and opening them up for hacking then perhaps a use could be found to avoid them heading to the dump.
First Look
A bit of searching on AliExpress and Ebay led me to find the Tenda 4G185 v3 MiFi device, a UK based ebay seller clearly had a job lot and was selling them for £10 ($13.5) each. A quick google search didn’t bring up much information but I still went for it and ordered one.
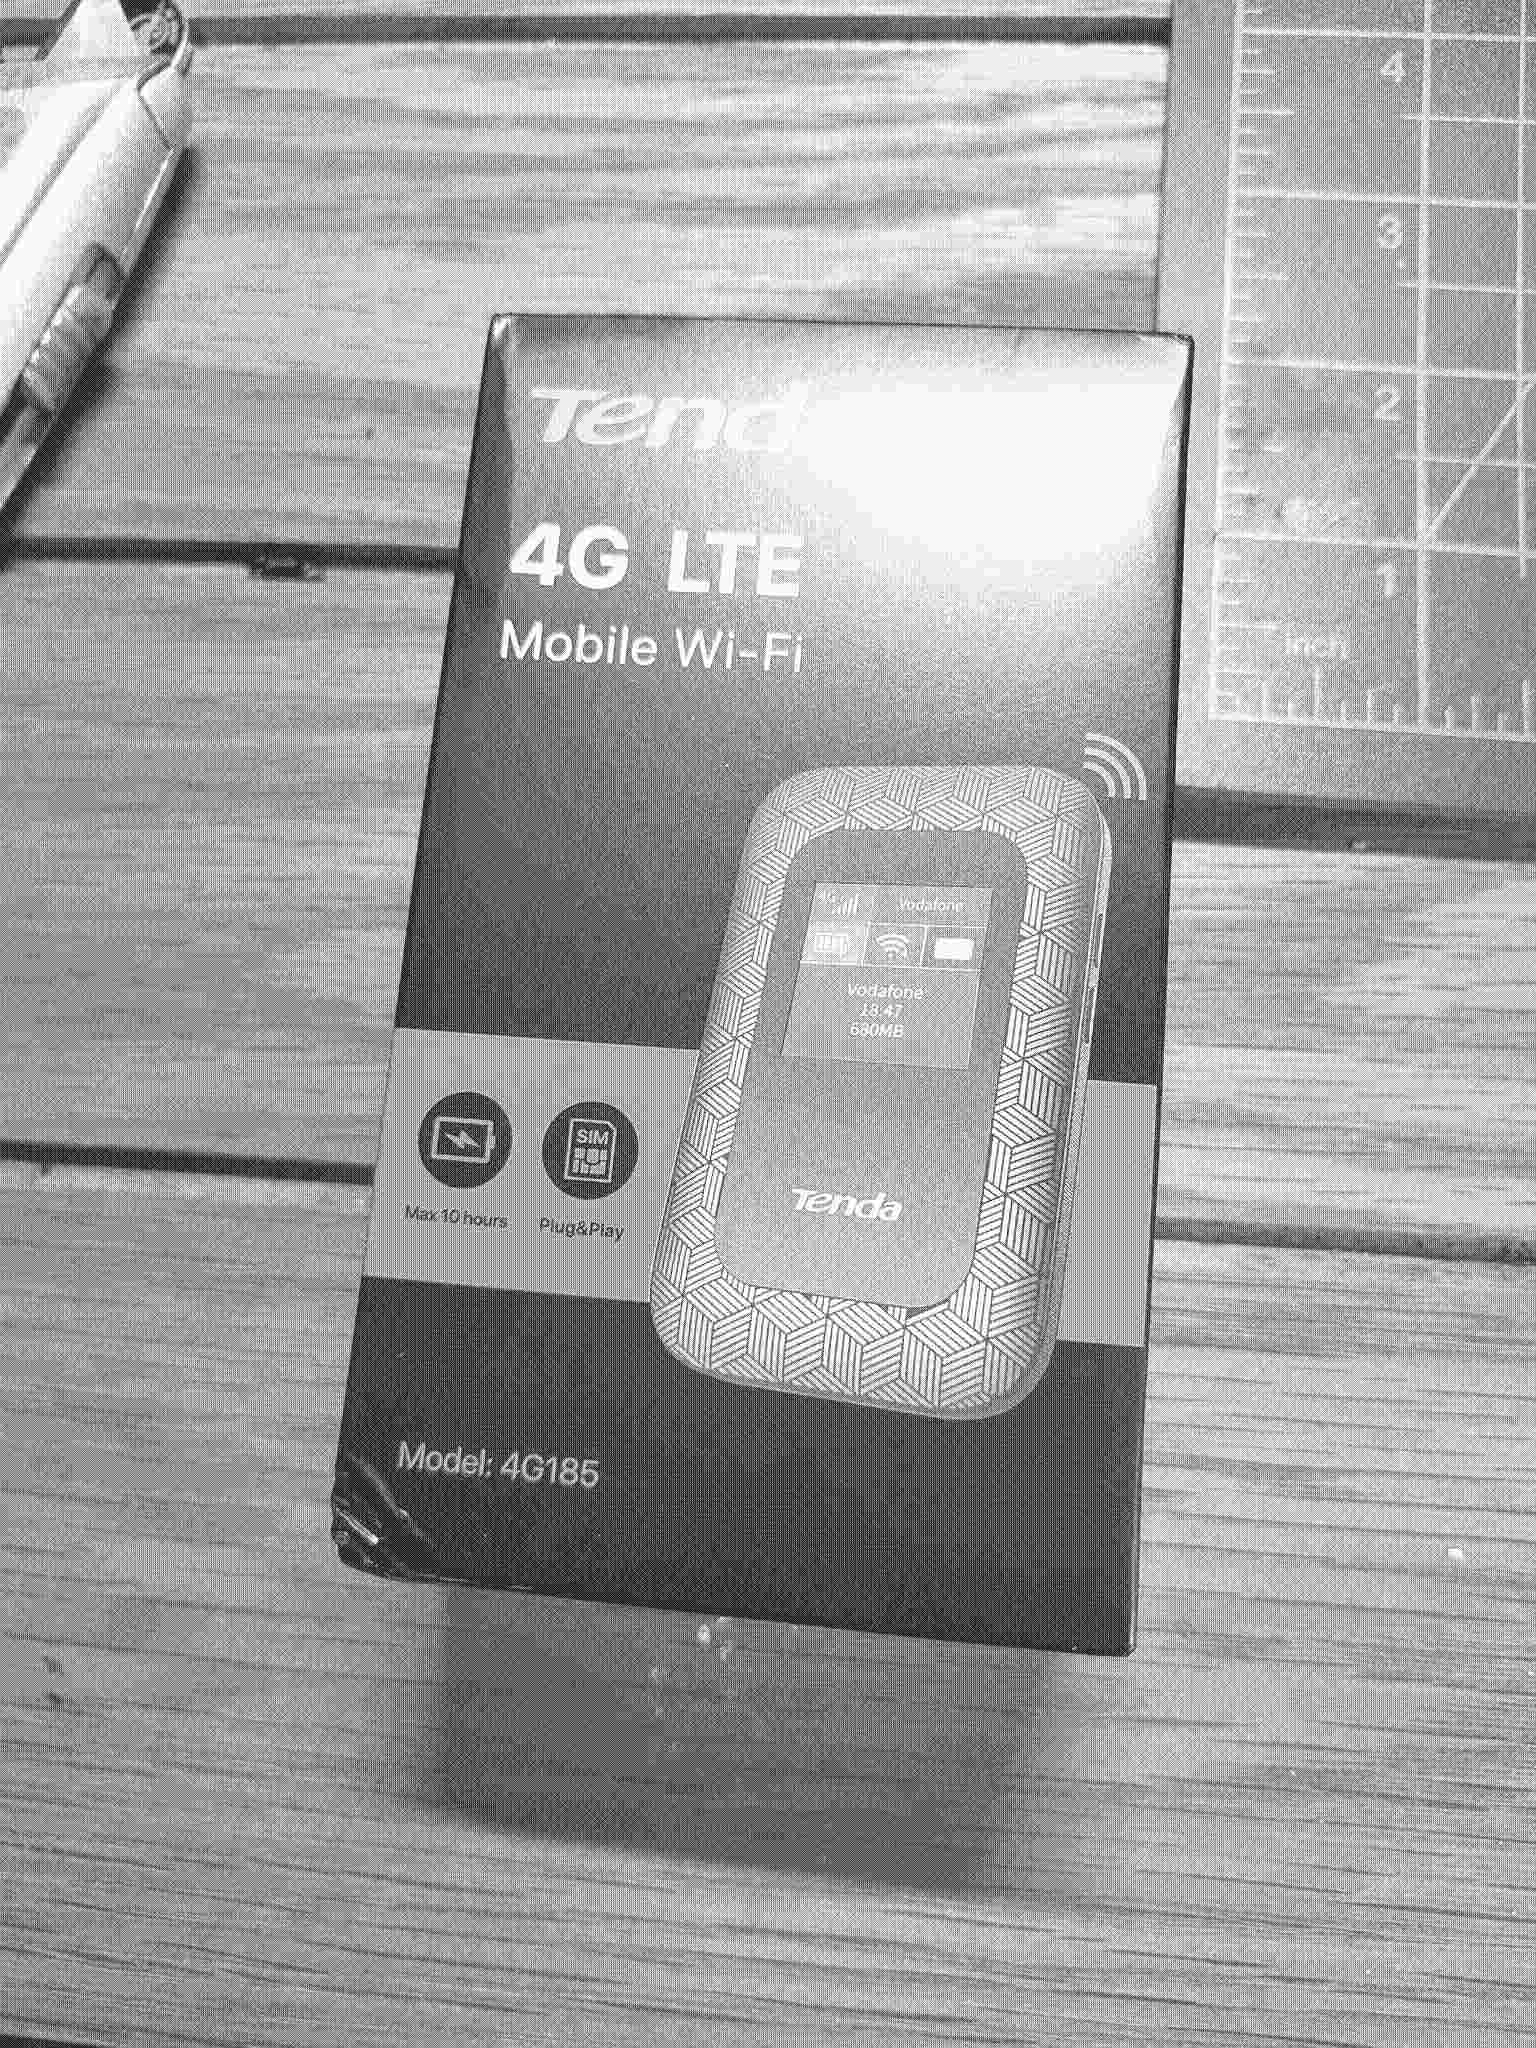
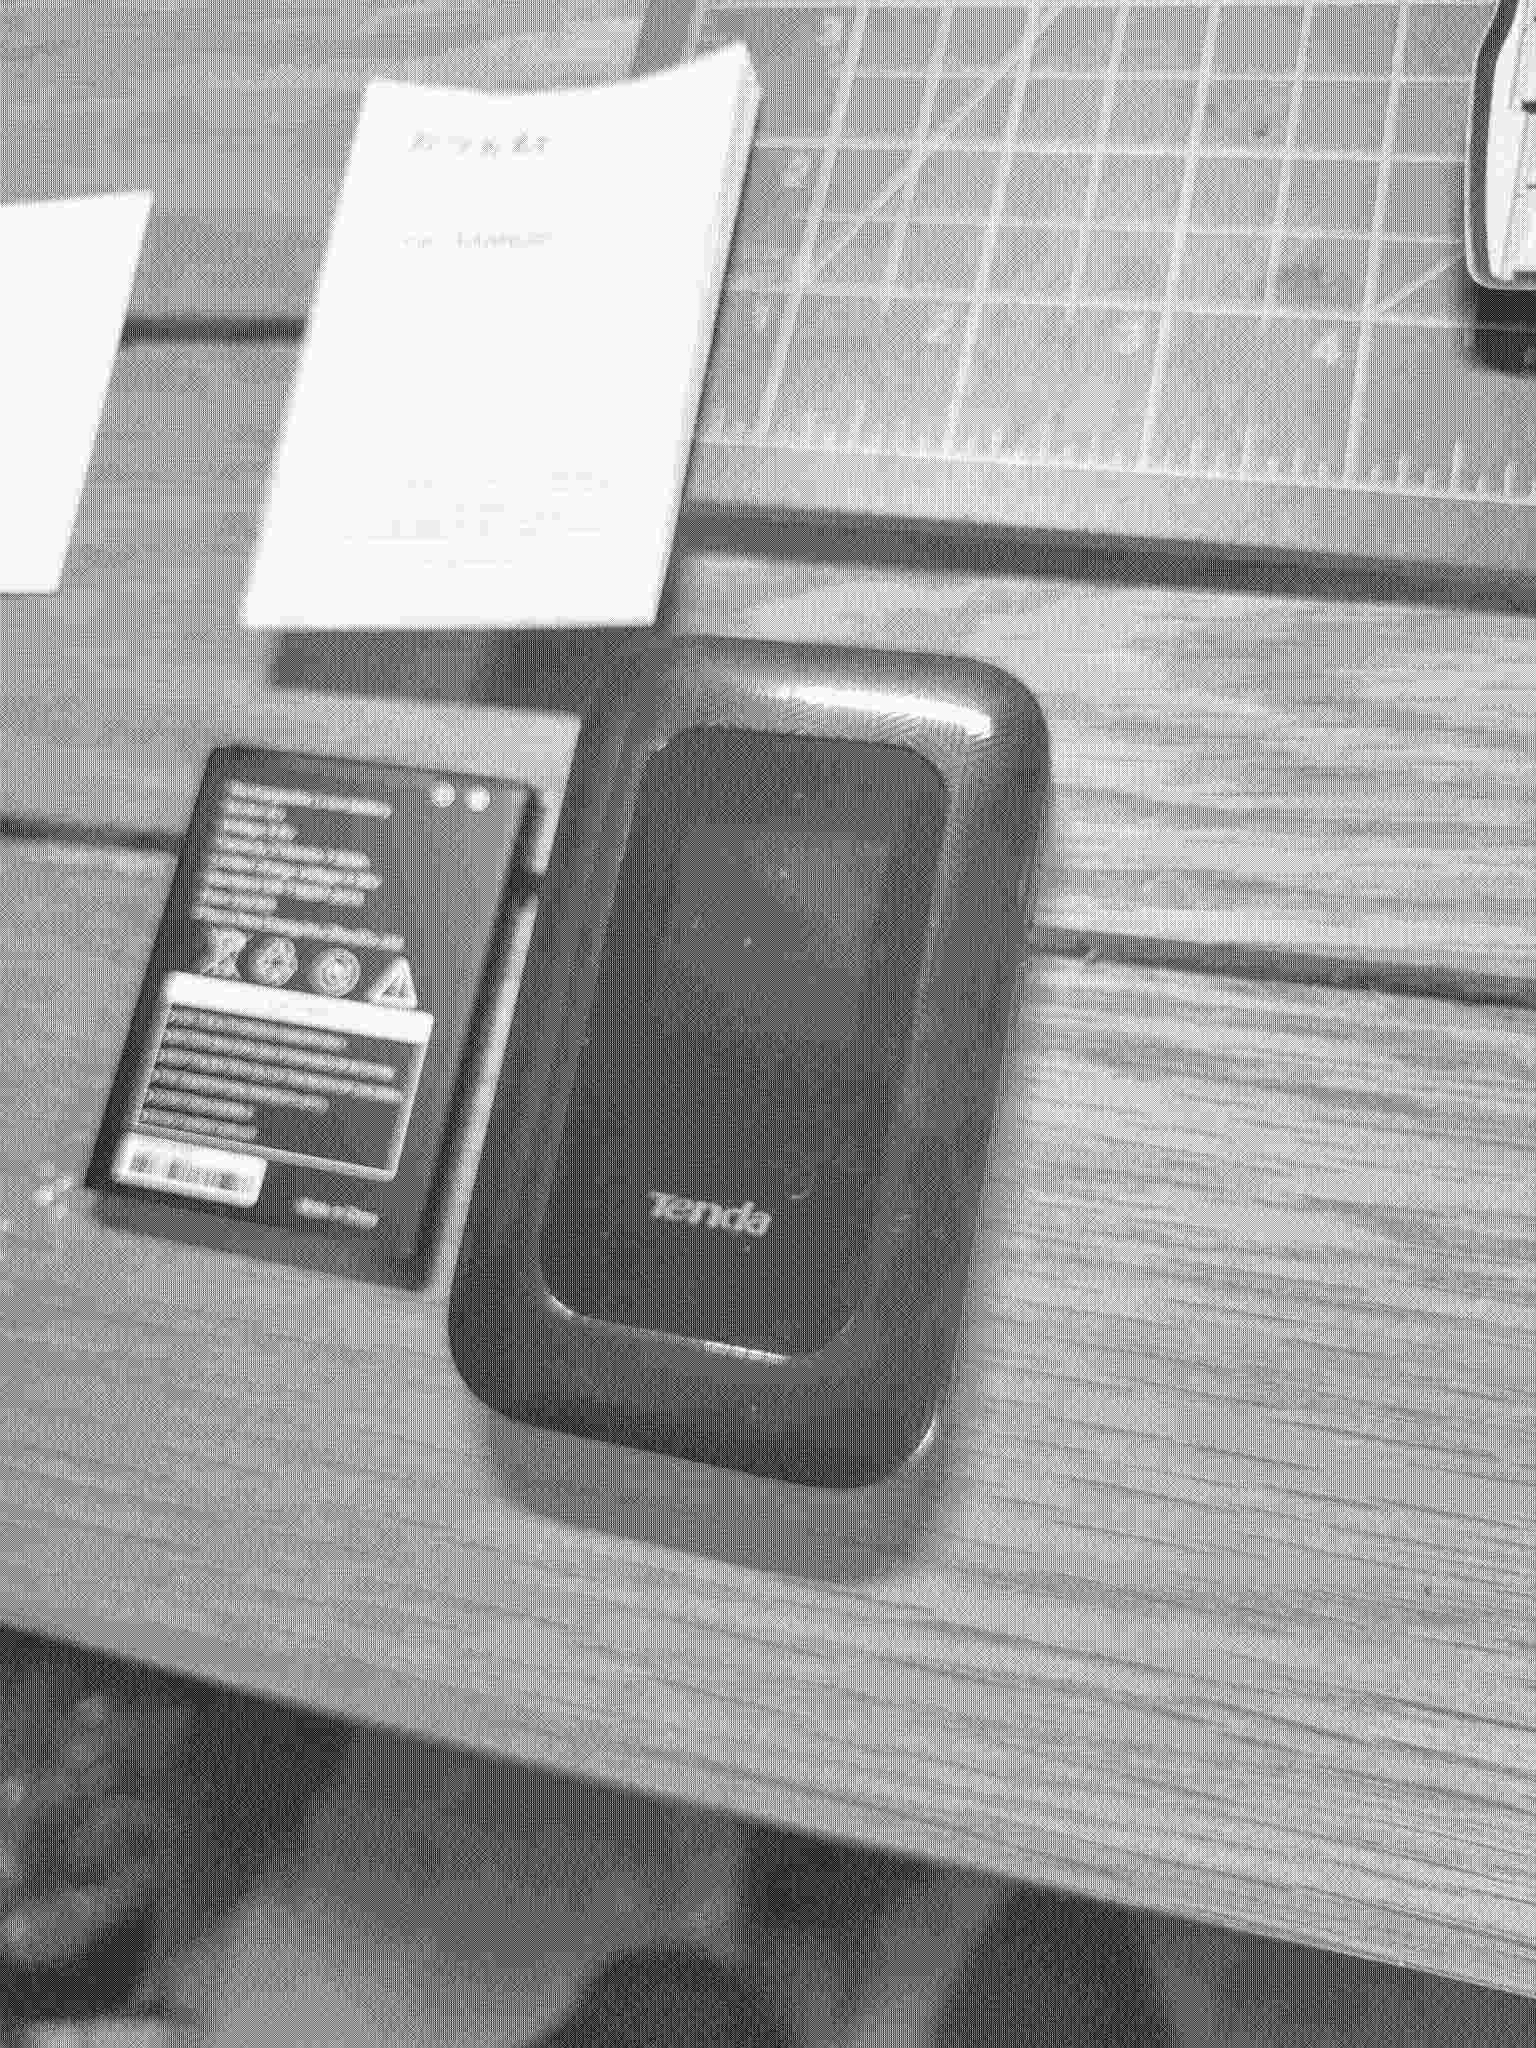
Similarly to the device ge0rg had opened up the Tenda 4G185 is a small (59mm x 98mm x 15.5mm) plastic device, it has a central 1.44in colour screen, 2 side buttons. Removing the rear case there is a 2100mAh Li-Ion battery, a Nano Sim slot, an SD card and at the bottom is a Micro-USB port.
Turning it on you get a (slightly cheesy) splash screen displaying “Tenda” and then it loads into a function an colourful display with shows Wifi strength, battery strength, sim status and reception status. If you press the side buttons it cycles through wifi log in details and a QR code. Holding down the power button for a few seconds and releasing will turn the device off (with another cheesy ‘Goodbye’).

Game Plan
- Explore the device including PCB
- Get root access
- Build a mobile webserver
- Host this website
Little did I know that this deep dive would become all consuming involve purchasing multiple devices, learning about exploits and CVEs, reverse engineering binaries with Ghidra, screaming at read-only filesystems, attempting to inject commands via nvram, learning about cross-compiling and finally finding a internal vulnerability in a shell script that allowed me to run my own apps!
Research
Despite my early research coming up with very little it turns out that there are loads of branded versions of pretty much the same device. It wasn’t difficult to find out about the actual hardware:
- SoC: ZTE ZX297520V3 (ARMv7)
- RAM: 32MB
- Storage: 128Mb SPI NAND
- WiFi: Realtek
Also on the back it has a FCC ID: V7T4G185 though if you look at the FCC website you don’t really find much more about the device (sometimes they have more insights).
The ZTE ZX297520V3 is a common SoC that is used in various 4G routers (both with batteries and also designed for static use). Many have a very simialar design with a small screen in the centre or they might have some illuminated images (wifi/cell/battery).
As we will come onto ZTE devices seem to have a lot of published exploits particularly in relation to their web configuration interface.
As I worked on this project more I found that a number of people had done very similar projects and investigations, I defintely reinvented the wheel a number of times.
Opening it up
Disassembly of the device is easy, with the rear of the case removed (there is an easy to access gap at the bottom) it is then necessary to remove 6 small screws and then with a little bit of prying the case will come apart. I left the frame in place as this kept the battery in place (and while you can use it without a battery it is more stable with a battery).
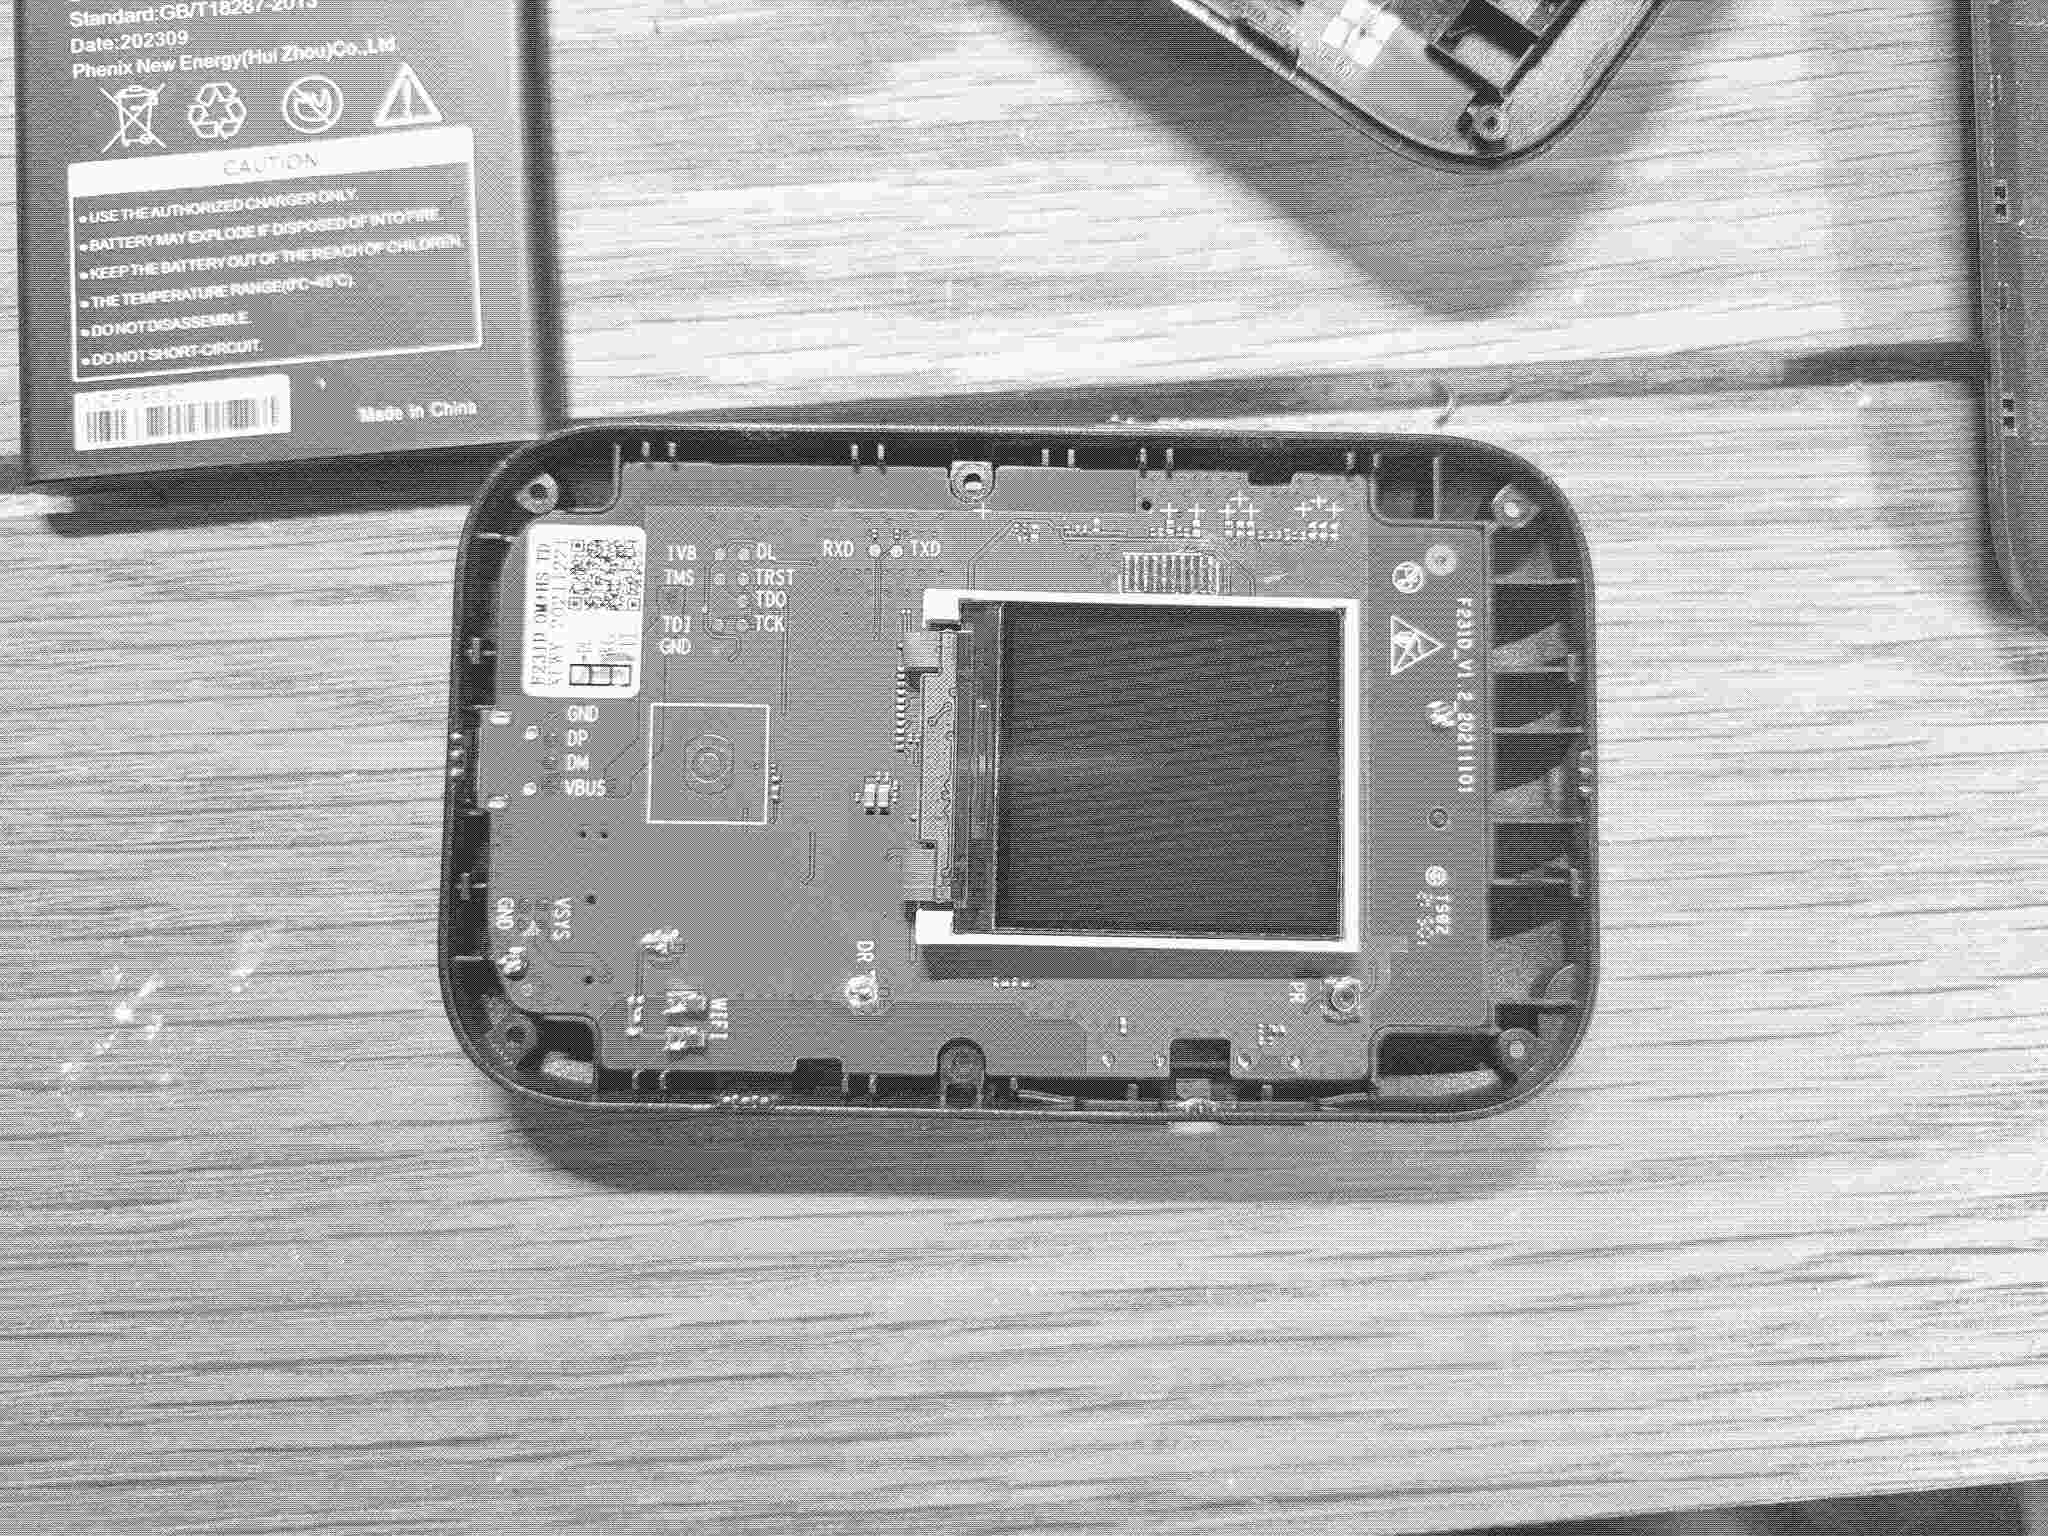
The front of the PCB has the screen attached (this can move around once the case is off so I used a piece of tape to stop it from moving). The PCB has identifying markings of F231D_V1.2 and very helpfully it has 2 small pads labelled Rx and Tx, the USB port has pads for VCC, GND, D+ and D- and it also has 1.8V JTAG pads labelled. In my experience its unusual to have so many pads clearly labelled but I’m not going to complain!
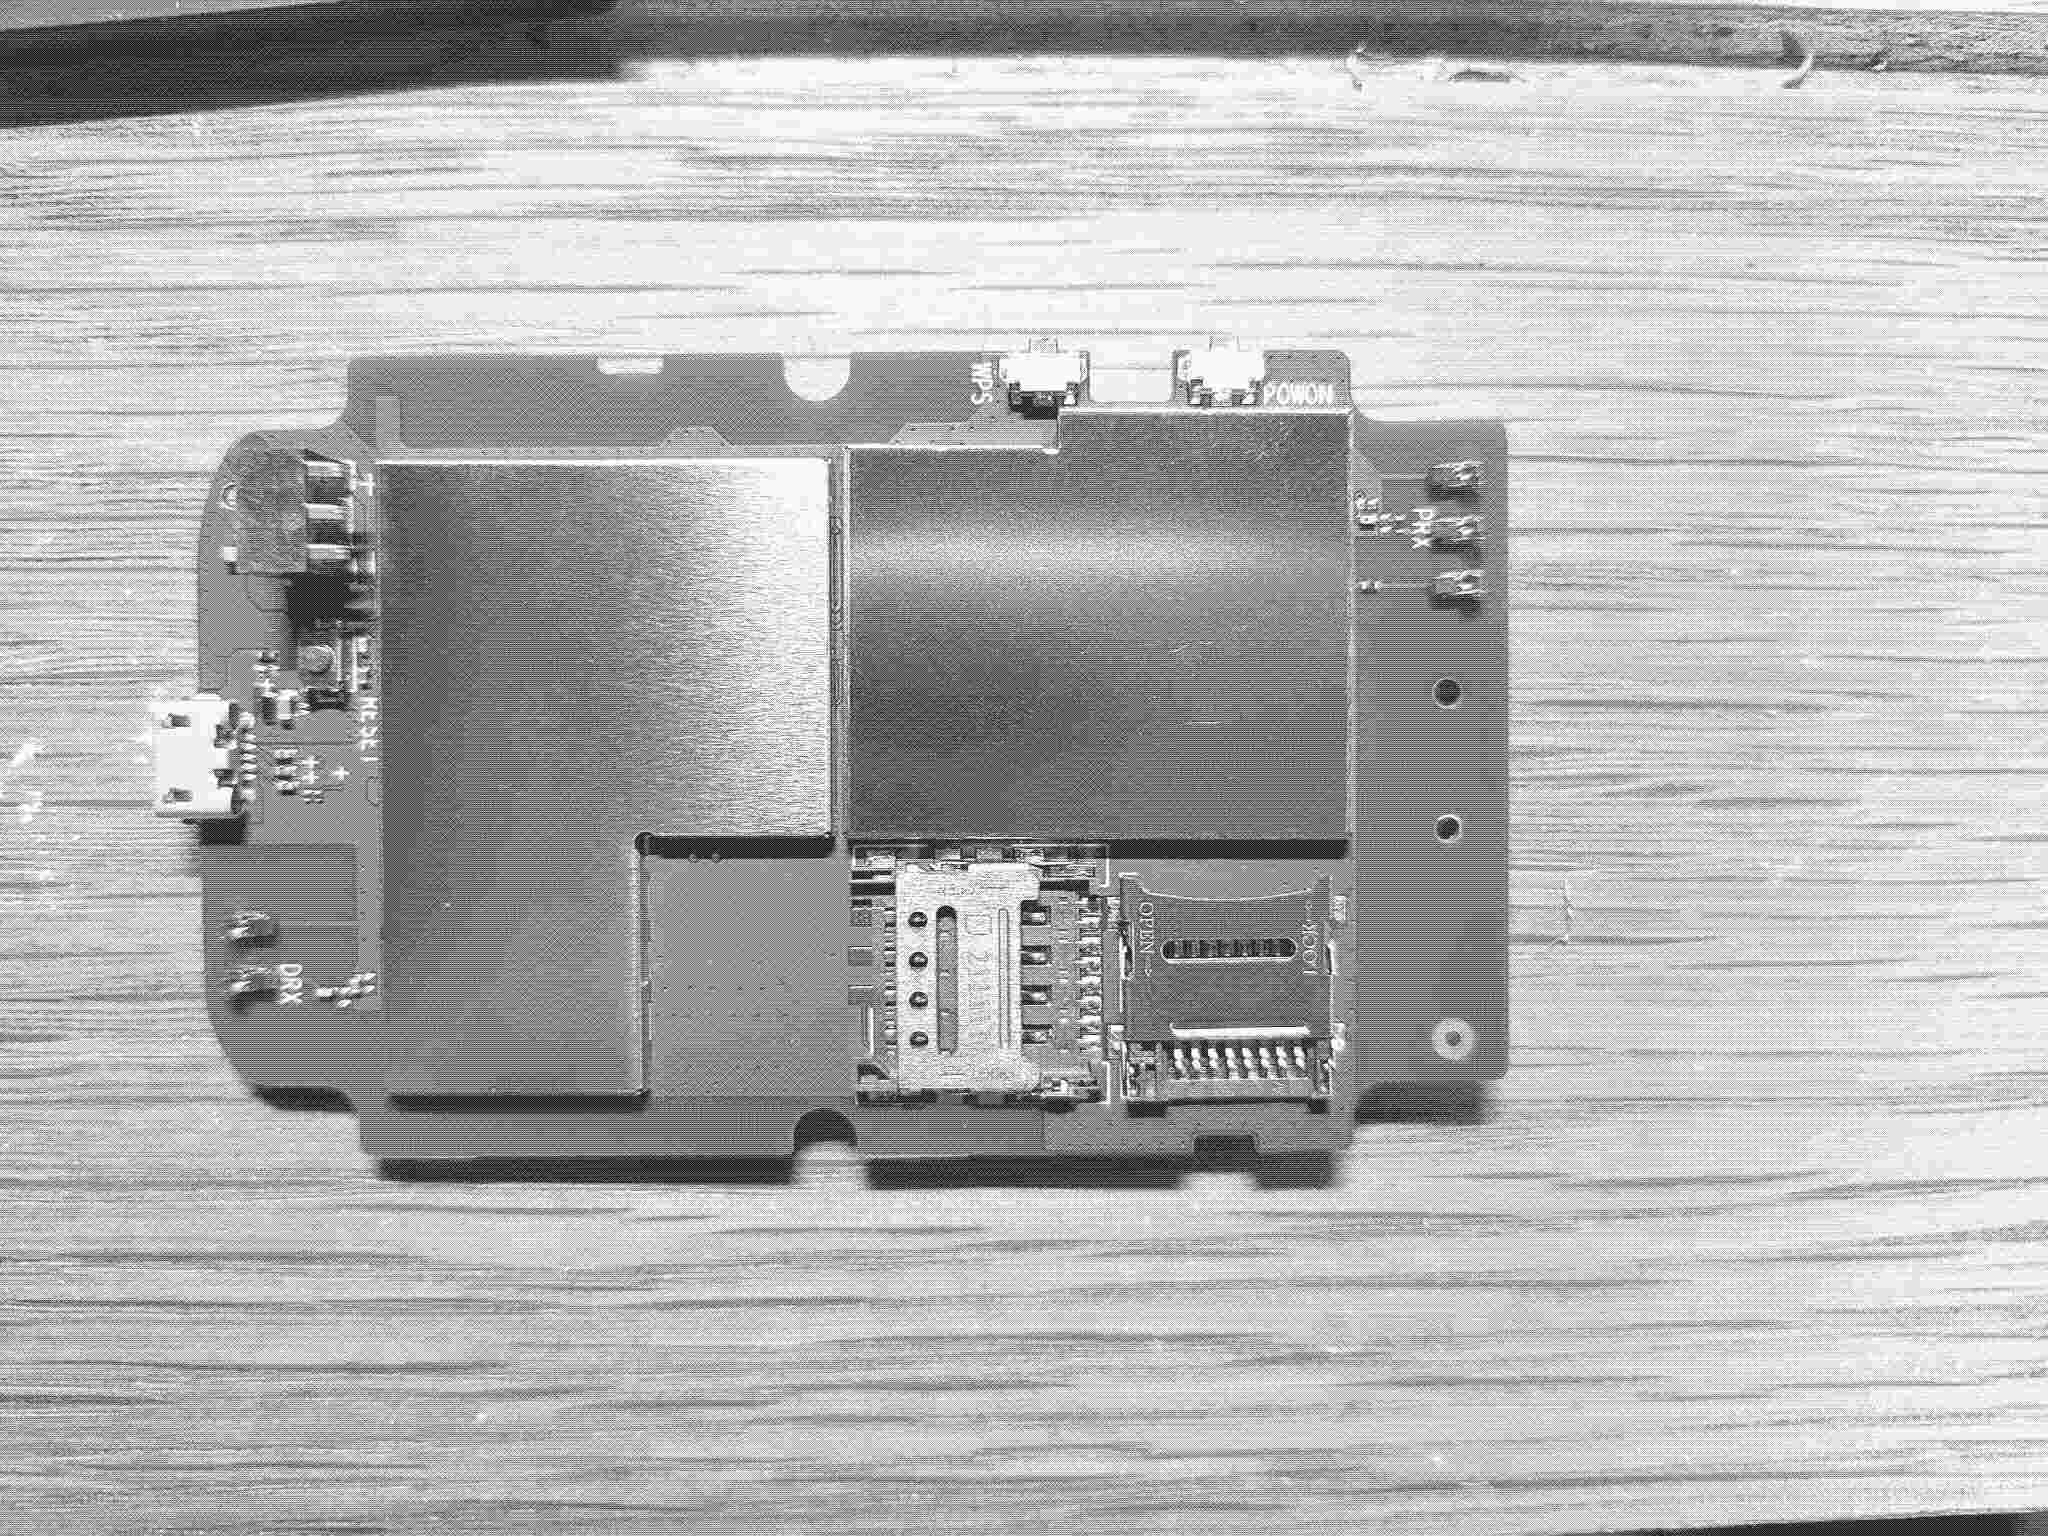
There aren’t any particular pads on the rear of the PCB of any interest though there is a reset push button, the SIM card and a microSD card holder as well as the battery connector.
Serial access
First thing was to solder some wire to the Rx and Tx pads (be careful to make sure the wire is secured with some tape as I managed to lift the pads on one of my models which forced me to buy 2 more devices). The pads are small and I found needed a bit of flux to ensure the solder melted, I also added a wire to one of tthe exposed ground pads.
Using a usb-serial converter, my earlier research had revealed that this serial port ran at 921600 (!) which meant that I needed to update my ckermit version (and in future I just used screen).
The boot log confirmed that the device had a ZX297520V3 SoC, that it had U-Boot 2011.09 and Linux 3.4.110-rt140, most of the filesytem was jffs2 and was readonly though it did mount a readwrite partition. Annoyingly the U-Boot was not interruptable as it had bootdelay=0 and eventually the device does boot to a login. There is a lot of background logging to the uart in regards to the 4G modem and the wifi. Despite lots of evidence that the login username and password should be admin nothing I tried allowed me to login through the uart - this was confirmed by a number of sources of people trying to do similar. The serial line did however become a useful error and debugging console as the device has its verbose settings to max. A copy of the beginning of the boot log can be found here.
Lots of exploits
Through my research it turns out that the code that ZTE use for their configuration interface is full of holes and despite these issues being reported ZTE don’t seem very interested in providing fixes particularly for older devices.
I found a lot of useful information in the ZX297520V3_HAX github and also the accompanying blog. As you can see the travel router that lr-m worked on is near identical to the 4G185. The devices provide a web interface hosted on a version of the goahead embedded web server, there are multiple end points but perhaps the most interesting are goform_get_cmd_process and goform_set_cmd_process.
Unfortunately most of the ZX297520V3_HAX vulnerablities didn’t work on the 4G185, it seems that it was running a newer version and many of the inputs were now being sanitised. It was a shame as there was reference to telnetd, if I could get that working I’d have the root access I craved. It was also not possible to exploit any of the directory traversal bugs or upload any files apart from to the SD card. Exploits that did work were:
arb_cfg_clear_v1- allows you to wipe nvram enteriesGOFORM_MOVE_TO_SIM_crash- kernel panics the deviceGOFORM_DELETE_SMS_crash- kernel panics the device
There was also an excellent defcon presentation by Pen Test Partners - interestingly none of these seemed to work on the Tenda device but its an important lesson into how insecure these devices really are.
Other interesting sites/blogs/githubs include:
- http://blog.asiantuntijakaveri.fi/2017/03/backdoor-and-root-shell-on-zte-mf286.html
- https://github.com/paulo-correia/ZTE_API_and_Hack
- https://teamrot.fi/wan-to-lan-exploitation-of-4g-broadband-modem/
- https://github.com/thiwaK/ZLT_S10_CPE
- https://github.com/kozik47/zte-imei-unlock
Disassembling goahead
Much of this work has been searching for any scraps of information I can find, on the PCB it was marked as F231D_V1.2, searching this brought me to a firmware dump of a number of devices, it appeared that the F231ET_V1.3 seemed to be fairly similar in description to the 4G185.
I therefore put the dumped goahead binary into Ghidra - it was my first time properly using Ghidra and it took me a lot of reading/listening to a podcast and youtube videos to even get a grasp of it.
I spent a very long time searching through the disassmbled code but were unable to find anything new.
Getting stuck in debug_mode
There was one command that was relevent, I had come across it through a number of sources but also within the goahead binary:
curl -X POST http://192.168.0.1/goform/goform_set_cmd_process -d "goformId=SET_DEVICE_MODE&debug_enable=1"
Turns out there are 4 options:
- user
- debug
- factory
- amt
Unfortunately I switched the device into amt mode, in this mode the wifi/network interfaces aren’t started and instead 3 GSM mode serial ports appear over the usb link. It wasn’t clear what these serial ports did and as I didn’t have access to a network interace I wasn’t able to send the goform_set_cmd_process command to get back - the device was stuck.
Disassembling zte_amt
I was able to identify that the serial ports were running at 9600 (though I suspect that baud rate doesn’t matter) and that if I sent data to the first port I got an error message on the main serial console
<AMT><ERROR>Amt_ReceiveData: fd = 5, packet_len(1409288282) is wrong.
Reviewing the rc file that was in the similar firmware dump I was able to identify that in the amt bootmode it was opening a binary called zte_amt:
if [[ $bootmode == "amt" ]]; then
nv set ver_mode=0
zte_log_agent &

zte_amt -p 10027 &


adbd &

exit 0
fi
It also started adbd however I couldn’t get access to this as there was no network access and it didn’t seem to work over the serial ports.
I therefore stuck zte_amt in to Ghidra to try and understand how it worked and with quite a bit of help it was possible to decode the AMT protocol:
- 4-byte little-endian length prefix
- Start delimiter 0x02
- 2-byte message ID
- Payload
- XOR checksum
- End delimiter 0x02
It was possible to work out from Ghidra that there were particular message ID:
# Key message IDs from analysis
MSG_SET_BOOT_MODE = 0x1000
MSG_NVRAM_COMMAND = 0x1FFF
MSG_GET_VERSION = 0xD1
MSG_GPS = 0x100D
Interestingly I found a test suite I assume was used to debug the devices with a message ID of 0x5000 - 0xFFFF:
- Start Keyboard test
- Start Keyboard test
- Stop Keyboard test
- Start LCD test
- Stop LCD test
- Board LCD test
- Start LCD backlight test
- Stop LCD backlight test
- Start vibrator test
- Stop vibrator test
- Battery voltage test
- Battery temperature test
- Charger status test
- Start back camera test
- Stop back camera test
- Board camera test
- Stop Mic-Receiver test
- Stop Mic-Speaker test
- Start TP test
- Stop TP test
- Board TP test
- Start G-Sensor test
- Stop G-Sensor test
- Board G-Sensor test
- Flashlight test
- wifi test
None of these tests seemed to work so I gave up. There is also the possiblity that there is a MSG_NVRAM_COMMAND which I didn’t explore further but might be interesting to someone else, there is also a MSG_GPS command and unsuprisingly this didn’t do anything.
Breaking out of debug_mode jail
I was therefore able to write a script that could send the right command to change the boot mode - change_debug_mode.py
Back to trying to get root access
Understanding rc
After a number of further dead ends of research I went back to the similar dumped firmware and looked at the rc file again and there it was in front of me:
if [[ $bootflag == "1" ]]; then
if [[ $bootreason == "2" ]]; then
 #zte_mmi poweroff_charger &
# zte_usbCfgMng poweroff_charger &
# zte_mainctrl poweroff_charger &
 #zte_watchdog &
 if [[ $modetype != "user" ]]; then
adbd &
fi
 #zte_log_agent &
 exit 0
fi
fi
As long as you aren’t in amt mode (which runs earlier in the rc script) and not in user bootmode then adbd does get run, therefore in debug mode you can access adbd over the network connection.
Finally root access
Running adb shell on the host system will connected to the adbd server on the device - and we have busybox access
BusyBox v1.21.0 (2023-09-08 16:28:42 CST) built-in shell (ash)
Enter 'help' for a list of built-in commands.

~ #
Oh - it turns out that this device doesn’t have the telnetd binary - so much time was wasted trying to get that to initiate.
Attempting to use buildroot to compile programs
Now I had root access it was time to actually put the device to use. Like many embedded devices the filesystem is actually mounted read-only which makes making any changes quite a challenge. That said a significant chunk of the 128Mb NAND storage is mounted as read-write:
~ # df -h
Filesystem                Size      Used Available Use% Mounted on
/dev/mtdblock5           22.0M     12.3M      9.7M  56% /
mtd:imagefs               8.0M      6.3M      1.7M  79% /mnt/imagefs
mtd:resource              8.0M      2.7M      5.3M  33% /mnt/resource
/dev/mtdblock7           83.0M      4.5M     78.5M   5% /mnt/userdata
/dev/mtdblock3            2.0M    500.0K      1.5M  24% /mnt/nvrofs
I then attempted to set up buildroot to compile programs - initially it didn’t work so I just gave up and instead went to cross compiling directly.
Direct cross-compiling
Cross compiling wasn’t particularly difficult, once I had installed arm-linux-gnueabi-gcc it was just a matter of adjusting the configure and ensuring that it was statically compiled. First thing compiled was nano and then I compiled a very small http server uhttpd.
I did try and install ngircd and while I was able to compile the binary it kernel panicked - I suspect that it is due to the limited available ram:
~ # free -k
             total       used       free     shared    buffers     cached
Mem:         23644      22004       1640          0          0       4896
-/+ buffers/cache:      17108       6536
Swap:        12284        160      12124
(It should be possible to free up more ram by killing some of the extra processes).
Failing to inject commands with NV
The next barrier to overcome was that currently the only way to run any commands or binaries was via adb shell which is not practical for this mobile device. Normally you would add a command to one of the startup scripts which then would initiate the various services. The issue with this setup is that the /etc folder is read-only and currently I’m too lazy to build and flash a new image (particularly as U-Boot is no accessible and so would require using the JTAG interface).
What now follows is another deep dive into many of the shell scripts that the system initiates and trying to manipulate the NVram variables to inject additional commands. This rabbit hole of work took up multiple days particularly trying to manipulate the variable ttl_value which is used by rc for iptables setup and also the path_log used in the script netdog_init_setup.sh. I even at one point thought I had got it working but it turns out the commands were getting run when I was setting the nvram and I was just too sleep deprived to notice.
My conclusion is that nv set variable= and nv get variable provide strings and therefore when used in shell scripts they aren’t able to change scripts in a way to inject a command.
I also grabbed /etc/shadow and spent quite a while trying to crack the password stored there but nothing:
~ # cat /etc/shadow
admin:$5$gRpMA.ZsFaNQg.i4$voHt3dJ4xIRYu5Ns1QnjHeVApduyJLrqwUsVzyqAtkA:17751:0:99999:7:::
internet.sh - finally some success
At this particularly low point in the project I was browsing the very verbose start up console output and noticed reference to a script called internet.sh, in this case it was reporting an error as it wasn’t able to initiate a netdog. Opening up internet.sh revealed the ultimate way in:
#!/bin/sh
#
# internet.sh,v 10.08.05 2010-08-05 15:00:00
#
# usage: internet.sh
#
path_sh=`nv get path_sh`
. $path_sh/global.sh
echo "Info: internet.sh start" > $test_log
echo "Info: `date +%m-%d %H:%M:%S`" >> $test_log
Breaking this down, the script grabs a path_sh from nv (the default is /sbin) and then excutes the script global.sh before returning to its script having imported all the variables from global.sh. This means that we can change path_sh to point to our directory, make our own global.sh script which runs the commands we want it to but then load the original global.sh into our script and once our script completes it will go back to internet.sh as if nothing changed.
Here was an early version of our global.sh:
# Reset
nv set path_sh="/sbin"
path_sh=`nv get path_sh`
. $path_sh/global.sh

echo "HACK: user global.sh activated" >> /mnt/userdata/log.log
echo "****************************************" >> /mnt/userdata/log.log
/mnt/userdata/hello >> /mnt/userdata/log.log
echo "****************************************" >> /mnt/userdata/log.log
echo "**Turn on HTTP Server*******************" >> /mnt/userdata/log.log
/mnt/userdata/uhttpd -p 8082 -d /mnt/userdata/website/ &
echo "****************************************" >> /mnt/userdata/log.log
/bin/sh /mnt/userdata/ensure_reboot.sh &
echo "****************************************" >> /mnt/userdata/log.log
In this script I reset the path_sh as I didn’t want there to be consequences for the booting system however if we want the system to run our script in the future we need to make sure path_sh directs to our directory before the system reboots/power cycles. I therefore came up with the ensure_reboot.sh script, this is executed on boot but sleeps for 180 seconds to ensure that boot is complete before changing the path_sh:
echo "Need to ensure reboot, sleep 3 mins" >> /mnt/userdata/log.log

sleep 180

echo "Set path_sh to ensure safe reboot" >> /mnt/userdata/log.log
nv set path_sh="/mnt/userdata"
nv get path_sh
nv save

echo "safe reboot done" >> /mnt/userdata/log.log
It may not be necessary to sleep for 3 minutes but for now I’ll remain cautious, if the device gets reset before ensure_reboot.sh completes then our scripts won’t be activated on the next reboot and it will be necessary to go in using adb shell and change path_sh using nv.
Website hosted!
After a quick installation of hugo on my Macbook and finding a very simple theme I started writing this website. Deploying is just a matter of copying the public folder over to the device and pointing uhttpd to the correct directory and there you go - hosted!
Conclusion
Its been an interesting deep dive into this little device, this project has shown that it is possible to run our own website on a small device - for a small blog it genuinely feels like a possible self-hosting option, and its got a battery!While currently I’m using USB to network it is possible to connect to the device’s wifi and access the website from there, you could easily make a solar powered local website or with a little bit more work host a community hub or a wifi dead drop (using an SD card for storage).
Next steps
- Write a guide to setting up a website from scratch on the Tenda 4G185
- Work out a good method to connect directly to my local wifi network so I can skip using USB for networking.
- See if I can use a more modern http server and manage my own certs to do http
- Try to run an IRC server
- Using Travel Router Hacking code we can use the screen to display our own info
- Setup a solar panel to charge the device.
- Actually see if the LTE modem works!
- The Tenda firmware is probably very insecure, perhaps we could use JTAG to flash our own firmware to the device.
References
- https://luke-m.xyz/travel_router
- http://blog.asiantuntijakaveri.fi/2017/03/backdoor-and-root-shell-on-zte-mf286.html
- https://www.pentestpartners.com/security-blog/zte-mf910-an-end-of-life-router-running-lots-of-vivacious-hidden-code/
- https://github.com/paulo-correia/ZTE_API_and_Hack
- https://teamrot.fi/wan-to-lan-exploitation-of-4g-broadband-modem/
- https://gitlab.com/ZX7520v3_Firmwares/F231/F231ET
- https://github.com/rkarimabadi/ZTE-MF79-usb-modem-Send-SMS
- https://gist.github.com/milankragujevic/9cfc5825c6cbc20900b94f6a75bf81d3
- https://github.com/teixeluis/zte-lte-modem?tab=readme-ov-file
- https://github.com/thiwaK/ZLT_S10_CPE
- https://luke-m.xyz/travel_router/p1.md
- https://github.com/lr-m/ZX297520V3_HAX?tab=readme-ov-file
- https://github.com/kozik47/zte-imei-unlock
Website built using Hugo with hugo-xmin theme on my Macbook and then copied across to be hosted on the 4G185. Images dithering is inspired by the excellent LOW<-TECH MAGAZINE and uses the script we use for the solarcene mastodon instance